This article applies to the MINI Cooper (2014-Present)
The engine oil works as a lubricant substance for the internal parts of the engine. Mini recommends replacing the engine oil as a basic maintenance every 5,000 miles. The more you wait on changing the engine oil, the more contaminated it gets, and the more its lubricant properties are diminished. Your Mini Cooper should tell you when it’s time to replace the engine oil, so if you are ready to replace the oil, read on to learn how you can do so on your own and protect your engine.
Materials Needed
- 8mm hex bit
- 10mm socket with extension
- Oil filter socket (27mm)
- Torque wrench
- Drain pan
- Funnel
- Jack and jack stands
- Engine fluid
- Engine oil filter
Step 1 – Raise the front
Before raising the car, open the hood and remove the oil filler cover. Set the handbrake, then use your jack to raise the car and secure it with jack stands. Never go under the car without having jack stands in place.
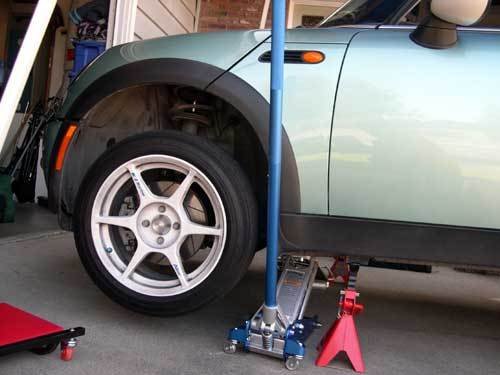
Raise the front of the Mini.

Remove drain plug to drain the engine.
Step 2 – Drain engine oil
- Place the drain pan under the drain plug on the engine’s oil pan.
- Use your 8mm hex bit to loosen and remove the drain plug.
- Let the engine oil drain completely.
Step 3 – Replace engine oil filter
To reach the engine oil filter, first remove the 10mm bolt holding coolant reservoir in place. Use your oil filter socket with extension to remove the oil filter. It is located under the coolant reservoir, all the way down. Install the new one the same way, then tighten the coolant reservoir back in place.
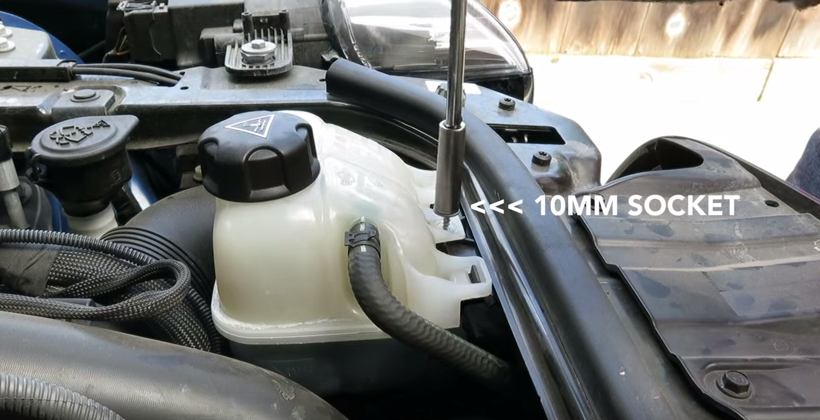
Remove the coolant reservoir’s bolt.
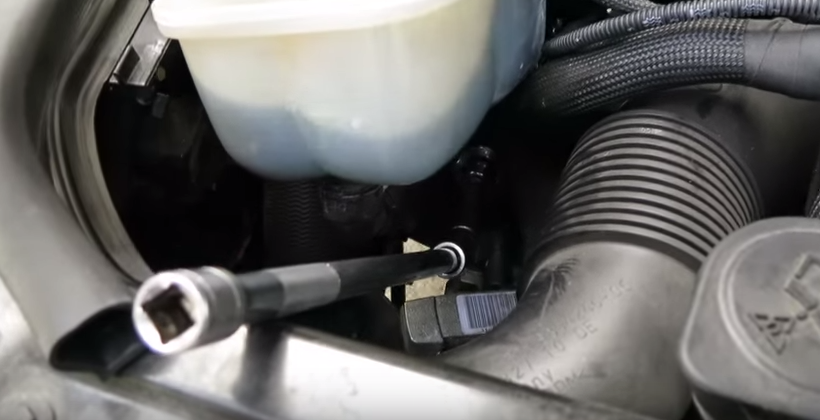
Replace oil filter.
Step 4 – Fill engine with oil
Tighten the drain plug and torque to 22 ft-lb. Fill the engine with 4.4 quarts of engine oil. Check the oil level and ensure it is just below the “MAX” line.

Please do not hesitate to contact San Diego Mini Cooper Independent Garage to learn about our Mini Cooper repair services!