This article applies to the MINI Cooper (2007-2013)
Engine oil is the most important fluid in your vehicle’s engine and must be changed according to your vehicle’s maintenance schedule, or indeed, even more regularly. MINI, for the time being, is still advising a rather startling 10,000+ mile interval between oil changes. Hot-running, turbocharged engines are not a big fan of that idea. Consider cutting that interval in half if you actually like your MINI. Not performing regular oil changes can cause major engine damage and promote oil burning/consumption. Changing the engine’s oil is the most common maintenance task and the best way to prolong the life of your engine. Doing it yourself can save you a lot of money, and you get to learn about your vehicle.
Materials Needed
- 1/2″ and 1/4″ socket wrench
- 8mm Hex socket (or #8 Allen wrench)
- 27mm socket
- 8mm socket
- Small screwdriver
- Oil drain pan
- Car jack
- Jack stands x2 (or ramps x2)
- New Oil Filter Kit (kit includes copper washer and O-ring)
- 5 quarts of oil
- Clean rag or paper towels
- Oil funnel
- Rubber gloves
Step 1 – Raise your car on jack stands and drain the oil
In order to drain the oil and reach the drain plug, the car must be raised off the ground. Use the car jack to raise the car (must be on a level surface with the parking brake set) and place the jack stands under your car according to the owner’s manual. Find the 8mm Hex oil drain plug on the engine’s oil pan at the bottom of the engine. Carefully remove the drain plug and make sure you have your oil drain pan ready below the drain because the oil will flow out fast and hot. Rubber gloves are recommended to prevent a possible burn from the hot oil.

The oil drain plug located on the bottom of the engine’s oil pan.
Step 2 – Remove oil filter and re-install drain plug
This vehicle has a cartridge-type oil filter, which is contained within a metal oil filter hosing. The oil filter housing is located at the front of the engine, just underneath the coolant expansion tank. There is a 27mm nut on the top of the filter housing. Use the 27mm socket to remove the top of the housing slowly; You will then see the old filter cartridge in the housing. Simply remove it from the housing. Once all of the oil has drained from the engine’s oil pan, take the drain plug and new copper washer (comes with oil filter kit) and screw it back into the oil drain. Hand tighten it first, then tighten to 25 Nm (18 ft./lbs). If the old copper washer is stuck to the oil pan, use a screwdriver to pry it off. Do not reuse the old copper washer.
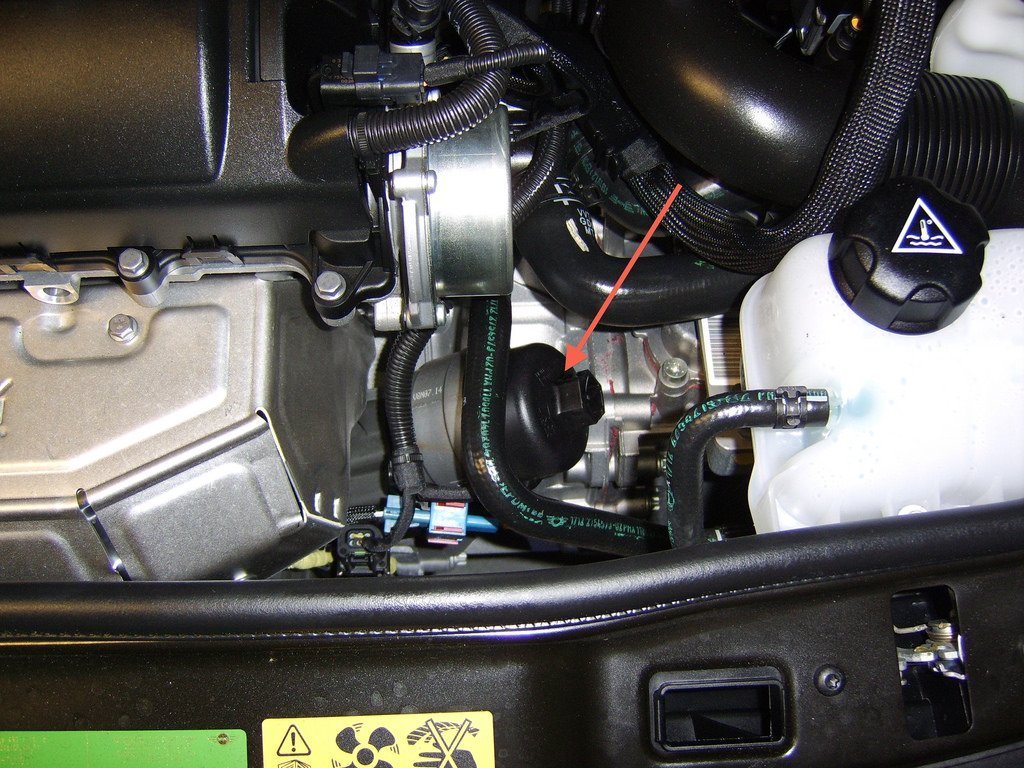
Location of oil filter housing.
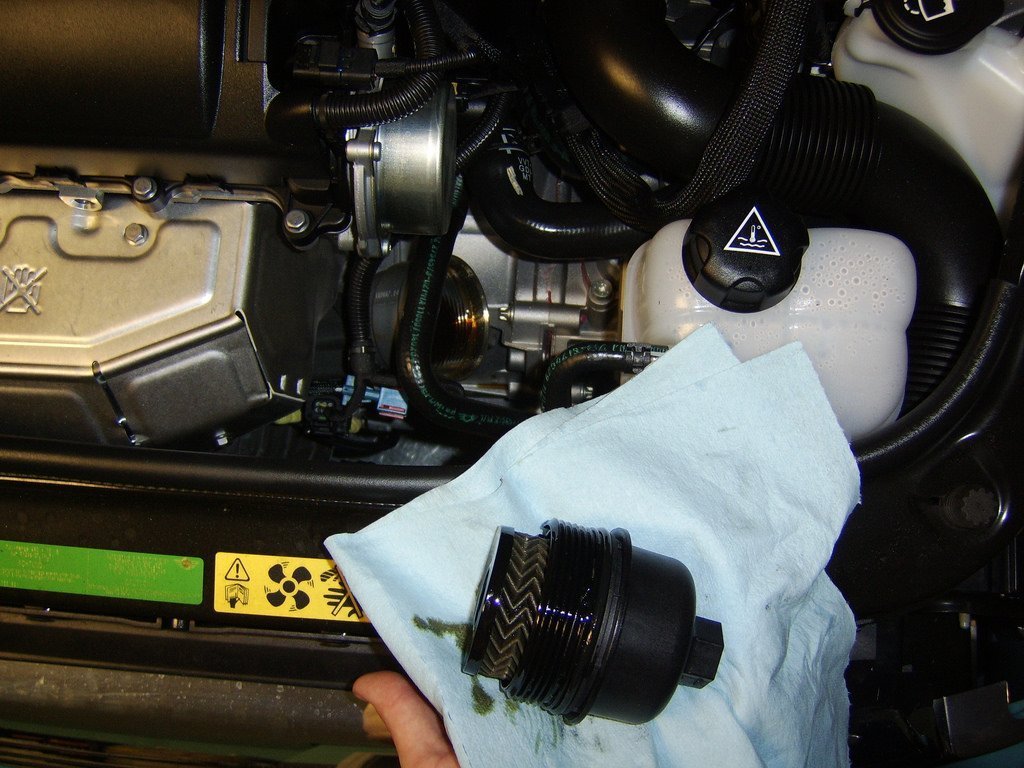
Housing and filter removed.

Drain plug with new washer.
Step 3 – Install new oil filter and O-ring
Take the new filter and place it in the housing and press it down into place. The rubber seal on the top of the filter should be facing down when you install the filter. Push the filter as far down into the housing as possible. Part of your oil filter kit should include a large O-ring. Remove the old O-ring from the oil filter housing cover; it is below the threads. A small screwdriver might help. Once removed, clean the housing cover inside and out with a rag. Once clean, slip the new O-ring over the the threads of the housing cover and into the groove of the cover. Take the housing cover and screw it back into the housing over the filter cartridge. Make sure it is threading right and tighten down to 25 Nm (18 ft/lbs).

The old and new filters.

Remove and install O-ring.
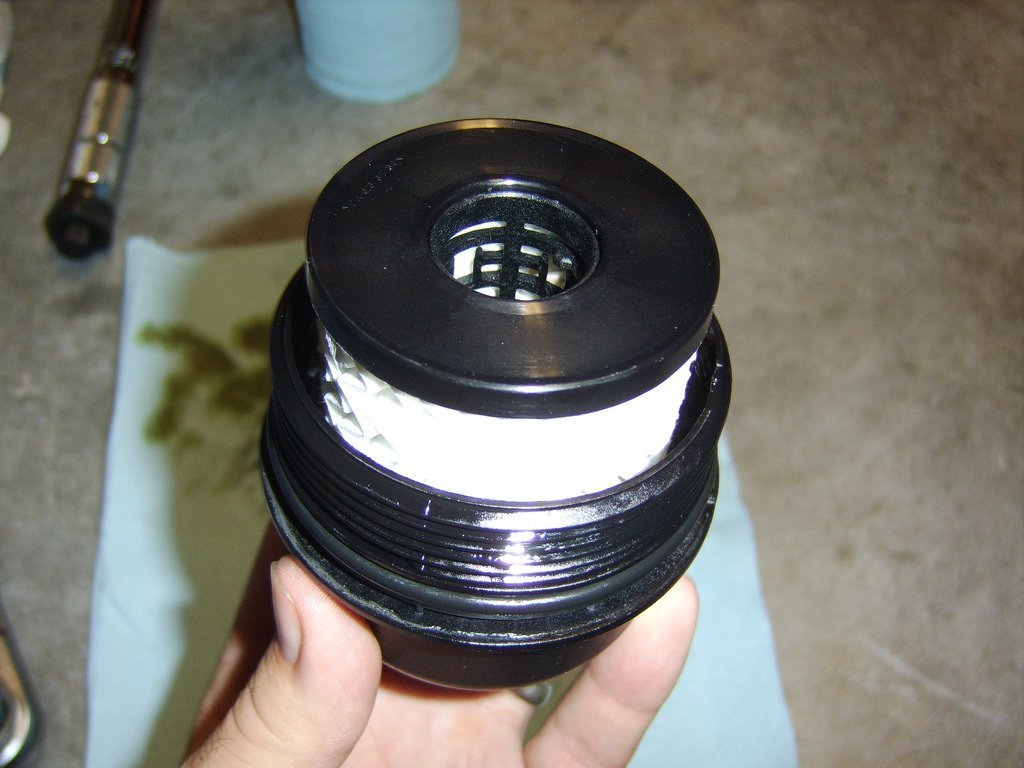
New filter in the housing.
Step 4 – Fill the engine with new oil
With the oil drain plug and oil filter installed, you can lower your car back to the ground. Fill the engine with the new oil through the oil filler hole at the top of the valve cover, and remove filler cap first (DO NOT put all 5 quarts). Add 4 quarts to the engine, and then check the dipstick. Continue to add a quarter of a quart each time and keep checking the dipstick each time. Fill it up until it reaches the top mark of the dipstick. In the end it usually takes about 4.5 quarts. Once done, remember to place the oil filler cap back on.
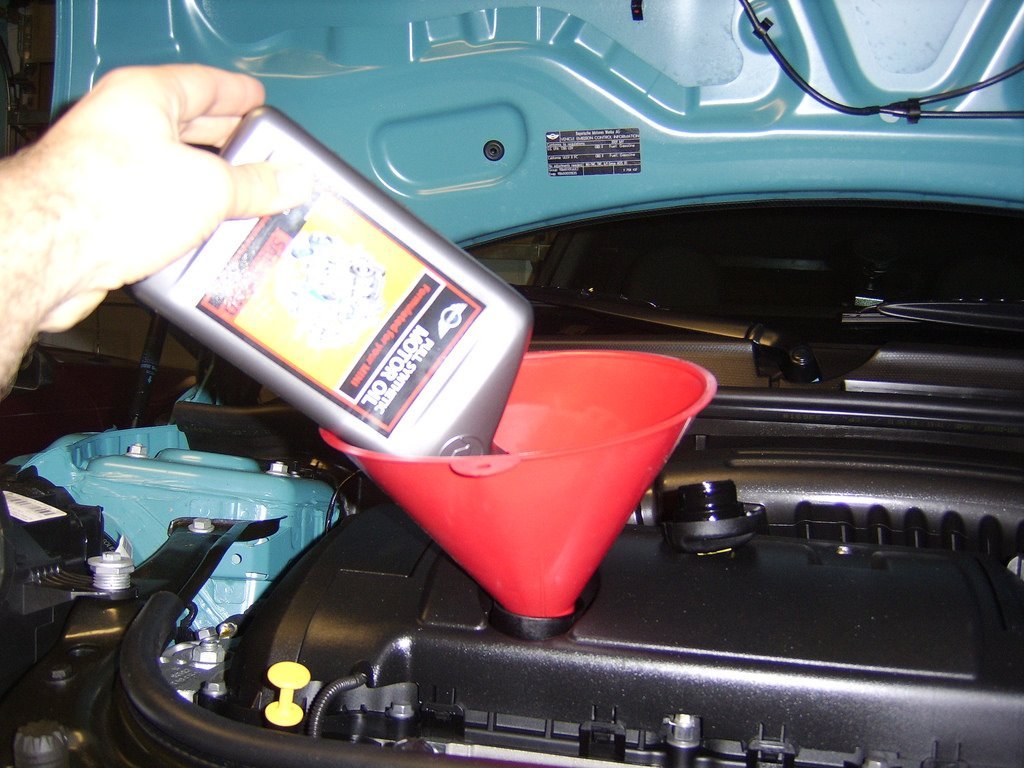
Pour the new oil in the engine; a funnel helps.
After you drive your car to operating temperature, check the level on the dipstick.
Step 5 – Drive the car and check oil level
Start the car with the hood open (oil pressure light might remain on for a second or two). Now look at the engine compartment and then look under the engine to make sure no oil is seeping out of anywhere. Now drive the car around until it reaches operating temperature. Turn off the car, wait a few minutes, and check the oil level again on the dipstick. If the oil level is not at the top point, then top it off until it reaches the top point of the dipstick. Please dispose of your old oil at a proper recycling station.
Please do not hesitate to contact San Diego Mini Cooper Independent Garage to learn about our Mini Cooper repair services!